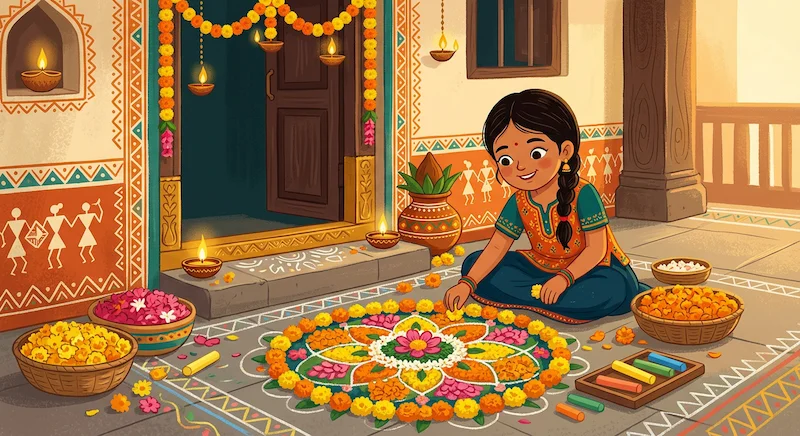
No rangoli powder? No foam sheets? No problem. Here are 3 beautiful rangoli designs every Indian child can make — using only things already at home.
It is the morning of Diwali. Priya‘s mother is in the kitchen making sweets. Her father is stringing lights on the balcony. And Priya is standing at the front door, looking at the bare floor.
“This needs a rangoli,” she thinks.
She goes to the kitchen. She comes back with three pieces of chalk, a small bowl of rice flour, and a handful of marigolds from the pot on the windowsill.
Twenty minutes later, the doorstep is glowing.
You do not need expensive art supplies to make a beautiful rangoli. You do not need special powders or fancy kits ordered online. Everything you need is probably already in your home. Here are three rangoli designs — one for every age and every occasion — that any child can make today.
Easy Rangoli Design 1 — Chalk Dot Rangoli 🔵
Best for: Ages 5 and above | Time: 10 minutes | Mess level: Very low
This is the most traditional rangoli method in all of India — a grid of dots connected by curved lines and filled with colour. It is called pulli kolam in Tamil Nadu and forms the base of almost every classical rangoli design. All you need is chalk.
- Make your dot grid. Use white chalk to place dots in a 5×5 grid — each dot about two finger-widths apart. This is your map. Every great rangoli starts with dots.
- Connect with curves. Draw smooth curved lines connecting the dots in a petal shape — start from the centre dot and curve outward to the next dot, then back in. You are drawing petals, not straight lines.
- Add a flower in the centre. Draw a small circle in the middle and add 6 small petals around it like a flower. This is the heart of your rangoli.
- Fill with colour. Use the side of the chalk (not the tip) to fill each section with a different colour. Smudge gently with your finger for a softer, blended look.
- Add a border. Draw a circle or diamond around the whole design, then add a simple pattern on the border — dots, zig-zags, or small triangles.
Easy Rangoli Design 2 — Flower Petal Rangoli 🌸
Best for: Ages 6 and above | Time: 15 minutes | Mess level: Zero
This is the most beautiful rangoli of all three — and the easiest to photograph. Flower petal rangolis have been made at temple entrances and home doorsteps across India for thousands of years. Marigolds are traditional, but rose petals, jasmine flowers, or even leaves work beautifully. The best part: when Diwali is over, the petals go back to the earth.
- Separate your petals. Gently pull the petals from each flower and keep different colours in separate small piles. Yellow marigold, red rose, white jasmine — these three together look stunning.
- Make your outline with leaves. Arrange green leaves in a circle or diamond shape on your tray. These are your borders — they keep the colours from mixing and give the rangoli a clean edge.
- Fill the sections with petals. Working from the outside in, fill each section with a single colour of petals. Press them gently flat so they lie smooth.
- Add a centre piece. In the very centre, make a small tight circle of yellow marigold petals. Place a lit diya right in the middle if a parent is helping.
- Photograph immediately! Flower rangolis are made to be seen, shared, and then gently returned to the earth. Take your photo before the wind reaches it!
Easy Rangoli Design 3 — Rice Flour Rangoli 🌾
Best for: Ages 8 and above | Time: 20 minutes | Mess level: Low (do it on the doorstep or a tray)
This is the original rangoli — the one Indian grandmothers have been making every single morning for thousands of years. In South India it is called kolam. In Rajasthan it is called mandana. In Bengal it is called alpana. Different names, same tradition. White rice flour on a doorstep, made fresh every morning — a gift to the earth, to guests, and to the day itself. Turmeric makes yellow. Chilli powder makes red. Haldi and kumkum from the puja shelf are your paints.
- Prepare your colours. In three small bowls or bottle caps, mix rice flour with a pinch of turmeric (yellow), a pinch of chilli powder or kumkum (red), and a mix of both (orange). Plain rice flour gives you white. These are your four paints.
- Draw your dot grid first. Using the plain white rice flour, make a 5×5 dot grid on your doorstep or a tray. Pinch a small amount between your thumb and index finger and let it fall in small drops. This takes practice — and that is part of the fun.
- Outline your design. Connect the dots with thin lines of white rice flour. A diamond or star shape works best for beginners. Pour slowly and steadily in one smooth motion.
- Fill with colours. Spoon each coloured flour gently into the sections of your design. Use a dry finger to spread it into corners. Work from outside to inside so you do not smudge what you have already placed.
- Add a final border. Outline the whole rangoli with a thin line of red kumkum or chilli powder. In Indian tradition, red on a doorstep is a sign of welcome and auspiciousness — you are inviting good things in.
Rangoli Across India — One Tradition, Six Beautiful Names
Called Rangoli — made with brightly coloured powder in geometric patterns. Often includes tiny mirrors and diyas. This is the style most people recognise today.
Called Kolam — made every single morning with white rice flour on the doorstep. Based on an ancient dot-grid system so mathematical that researchers study it for patterns!
Called Alpana — made with rice paste in white on a red floor. Drawn during festivals and weddings, featuring sacred symbols like the lotus, fish, and conch shell.
Called Mandana — red and white floor paintings made during festivals. Often covers entire rooms, not just doorsteps. One of the oldest art forms in India.
Called Aipan — made with rice paste on a red background, featuring sacred geometric patterns passed down through families. Each family has patterns unique to them.
Called Aripan — similar to Alpana, made during festivals and life events. Features nature motifs — the sun, moon, trees, and birds — drawn in white rice paste.
“When you make art with your own hands,
you are not just decorating a floor — you are carrying a tradition
that is thousands of years old.”
Every rangoli is made to be seen and then swept away — and that is the most beautiful thing about it. It teaches us that some of the most precious things in life are not the ones that last forever, but the ones we make with love, right now, for the people in front of us.
Watch: Beautiful Flower Petal Rangoli in Under a Minute!
See Design 2 made from start to finish — marigolds, rose petals, a tray, and ten gentle minutes. Watch once, then try it yourself! 🌸
🌸 Did You Make a Rangoli?
We want to see it! Send us a photo of your rangoli — chalk, flower petals, rice flour, or anything at all — and you could be featured right here on Kidistan as an official Young Artist of India 🌟
Be the first Young Artist on this wall!
Send us your rangoli photo on WhatsApp and we will add it here within 7 days.A Note for Parents
Rangoli is one of India’s oldest living art traditions — and unlike most ancient things, it is still made fresh every single morning in millions of Indian homes. When your child makes one, they are participating in something that stretches back thousands of years, from the doorsteps of ancient villages to modern apartment buildings.
All three designs in this article are intentionally zero-purchase — chalk, flowers, and kitchen staples only. We believe the best children’s crafts use what is already around them. The most beautiful rangoli Alina ever saw was made from curry leaves and marigold petals on a plain cement floor in Tamil Nadu. It cost nothing. It was extraordinary.
Ask your child to make a rangoli for a family member — a grandparent’s birthday, a sibling’s exam day, a parent who has had a long week. A rangoli made for someone, rather than just for a festival, teaches a child something even more valuable than art: that beauty is an act of love. 🌸
